
Installation – Everything you didn’t know you needed to know.
Today marks one year since the underfloor heating system in the Barn Conversion went live, and I couldn’t be happier with it.
It took a lot of research, determination, and a willingness to do this ourselves to get this done. By “ourselves”, I mean the tiler, the plumber / chauffagiste, and I.
Many folks think that the only radiated underfloor heating systems available require a concrete screed over the top of them.
That is not this system. This system can be installed by anyone. I mean, I could (and did) install it. It is light weight and the only real struggle is the brain activity needed for determining the course of the tubes should you require any deviations from the plan due to irregularly shaped walls or inconvenient doorways.
In order to not get too wordy, I’ve decided to limit this blog post to how we installed this particular underfloor heating system, – called a dry radiant heat system.
First things first – Plancher Chauffant
The first thing you need to know about underfloor heating in France is what it is called in French.
Plancher Chauffant (pronounced plan-shay show-fahn) or in the case of this system, it is Plancher Chauffant Sec
What is so special about this system?
Unlike heavy concrete screed systems, this system consists of 25mm depth polystyrene boards with grooves for the tubes and a layer of aluminum on the top side.
That’s it – Tubes in channels, ready to be tiled over – or covered with some sort of wooden flooring.
This system is readily available in France, yet I have had people reach out to me to tell me that their builder or plumber or the guy who knows everything down at the bar has said that all underfloor heating systems require digging down to make room for a screed on top of it.
Anyone who says that clearly hasn’t met me, because I tell everyone and anyone about this system. I love it so much that I’ve contacted the company to send me a quote for some spaces in the Ramparts Project.
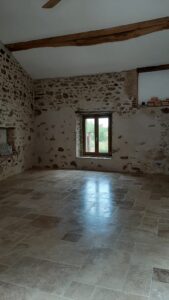
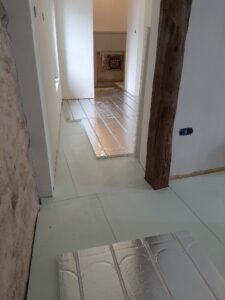
Application and finish in my Barn Conversion
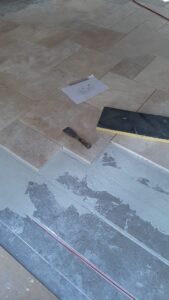
Installation in the Barn Conversion consisted of three layers over a brand-new concrete subfloor, consisting of extruded polyvinyl boards, the underfloor heating panels, and the travertine tiles. These layers all stuck together by special flexible adhesive meant for underfloor heating systems. The travertine is installed directly over the underfloor heating system using extra flexible tile adhesive and grout, both meant for underfloor heating applications.
This DIY project demanded a lot of brain work up front, but once we got started, it became pretty intuitive. Please note that the concrete subfloor was poured in anticipation of installation of this system and was therefore level to the millimeter and without any significant humps or dips. Depending on the existing floor you are covering, you may need to consider using a self-leveling compound (ragréage autolissant).
Let’s get to it, shall we?
INSTALLATION STEPS
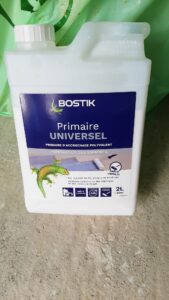
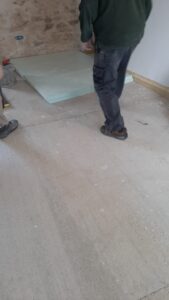
STEP 1 – PRIMING THE SUBFLOOR After ensuring that your floor is level, vacuum and prime the floor with a universal primer suited to the surface to allow a good grip for the adhesive. It’s a good idea to vacuum and prime between each layer of material.
STEP 1a – INSTALL INSULATION (optional) If you are using insulation panels, glue them to the primed floor using a special adhesive meant for underfloor heating. Ensure they are level. We beat them down with the flat side of a stair tread to minimize any dings in the top of the panel. We had to do a lot of scribing and cutting to make the panels fit because of the trapezoidal shape of the rooms and to allow for doorways, shower pan, etc. Ensure these panels are installed over the entire floor surface, even if the area won’t be heated. This is to ensure a level surface throughout your space. We dry-fit the panels first, then glued as we went room by room. Avoid walking on the panels for 24 hours after they are glued down to avoid any slippage. Vacuum this layer to get rid of all dust before proceeding to the next step.
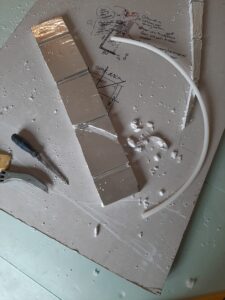
STEP 2 – DRY FITTING THE TUBE PANELS Dry fit the 25mm panels according to the tube plan. Ensure the grooves are aligned in a manner allowing the tubes to pass through doorways or around corners and return to the manifold without any extreme bends. This will require you to make your own grooves in some of the panels. In our case, we actually had to add additional grooves between the factory ones to accommodate more tubes passing through the bathroom and corridor than were channels on the panels.
You will want to mark any new grooves around corners or to accommodate awkward returns and connection with a permanent marker . You will not cut them out until STEP 4 to avoid unnecessary debris on the clean surface below.
STEP 3 – GLUING THE TUBE PANELS. Glue the panels to the clean surface underneath using adhesive meant for under floor heating. Ensure the existing grooves and any lines for new grooves are lined up exactly. Avoid walking on the panels for 24 hours to avoid slippage while the adhesive is curing.
STEP 4 – CUTTING NEW CHANNELS Cut out the new channels that you previously marked in STEP 2, ensuring that the grooves are all lined up from one panel to the next. (See NOTE below on how to make new channels.)
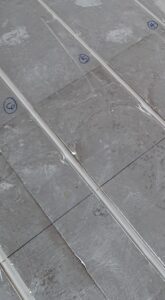
STEP 5 – RUNNING THE TUBES This was the most satisfying step for me and what all the other fiddly hard work was leading towards.
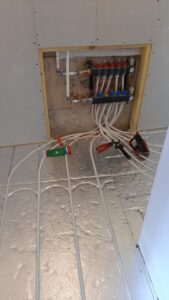
Run the tubes from the manifold through the channels and then back to the manifold. Cut the tubes with some excess to allow for flexibility when deciding which manifold outlet/inlet to use for which tube. We unrolled the coil of tubing along the channels as we went. We then stepped lightly on the tubing in a heal-to-toe motion to snap the tube into the grooves to avoid any rollercoaster effect. We always did this going in the direction the water would flow from the manifold supply to the return. Avoid pressing so hard on the polystyrene that you leave a dent in the panel.
STEP 6 – CONNECT THE TUBES TO THE MANIFOLD If this is something you are not proficient in, you may want to have a professional do it. In France a plumber can also be certified to do heating. They are called a chauffagiste . My plumber is also a chauffagiste, and he was there on the day we installed the tubes. The system was tested and operational on that same day.
This was actually the shortest step because of all of the anticipatory work we did during the panel installation.
STEP 7 – FINISH FLOORING Install your finish floor directly to the panels as you normally would, leaving a small gap where the flooring meets the vertical surfaces. If tiling, you must use adhesive and grout meant specifically for underfloor heating applications. Make sure you have additional expansion gaps over large surface areas to avoid tile or wood floor popping off or cracking. I decided on oak boards to fill these expansion joints. (The oak was installed after the travertine was sealed and grouted.)
Any adhesive or grout should be specific for underfloor heating applications. When you seal the finished floor, you can use the same tile or wood sealant you would use for any finished floor application.
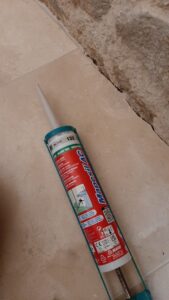
STEP 8 – SILICONE THE GAPS (as required) Apply silicone specifically for underfloor heating in any gaps between the expansion joints and the tile and in the gaps between the tile and any vertical hard surfaces, such as stone or cement walls. This seals the space between the two surfaces while allowing for the expansion of the tile when it is heated. This step is unnecessary where you intend to install skirting board to cover the gap.
NOTE – How to cut new grooves
- Mark the intended path of the new channel with a permanent marker.
- Cut the foil along the marker with a sharp blade.
- Use the end of a pen or a dowel to scrape out the polystyrene and pack down a new groove
- We found it best to keep a shop-vac handy during this process to immediately dispose of the excess polystyrene to avoid it spreading and settling back into the channels. We ensured our vacuum was emptied of all other debris so we could segregate the polystyrene to dispose of it properly at the waste-transfer station (déchéterie)
KEY TAKEAWAYS
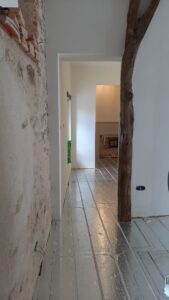
- This system can be installed directly over existing flooring.
- Finish flooring can be installed directly over the panels and tubes without a screed.
- If you are going over an uneven or unlevel surface, you might need to put down a self-leveling compound (ragréage autolissant). You may not need this if your system is installed over a new level subfloor without significant hills and valleys.
- Avoid walking on the various layers of materials for 24 hours after they have been glued down to avoid slippage while the adhesive is curing.
- You will want to dry fit and mark new grooves in the tube panels prior to gluing the panels down. We found that numbering each tube run using color-coded markers helped keep track of each tube path.
- Cut new channels after the tube panels have been glued down and cured. This ensures the new channels are lined up exactly. It is also much easier to cut and scrape out the new channels on a fixed surface, rather than dealing with them slipping and sliding as you are trying to cut or scrape. (This is definitely a “learn from our mistakes” tip.)
- To assist in snugging the tubes within in the channels, walk on the tubes from heel to toe in the direction the water flows from the manifold all the way to where it returns to the manifold to avoid a rollercoaster effect along the tubing.
- If you are unfamiliar with radiator heating systems, you might want to have a plumber hook the tubes up to the manifold (distributeur).
- Install expansion joints in the finish flooring and also allow for a gap where the flooring meets any vertical surfaces.
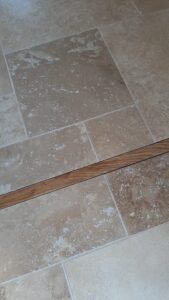
An oak expansion joint
Things to do before ordering and installing the system
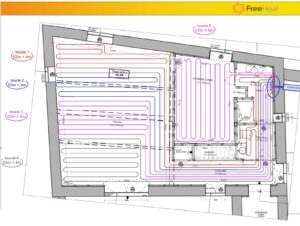
- Determine where you want your manifold to go. You will need to provide that information to the supplier, along with a floor plan or sketch before they send your tubing layout (plan de calipinage).
- Be sure to source your adhesive, any grout (if needed), and silicone in advance. You will need extra flexible adhesive and grout specific to underfloor heating applications to allow for potential shifts of materials during heating and cooling.
- Ensure the subfloor and any intermediate layers on which the system is to be installed is perfectly level and that all construction mess is cleaned off. Scrape off all globs of dried plaster and fill in any valleys with tile adhesive as needed for all layers.
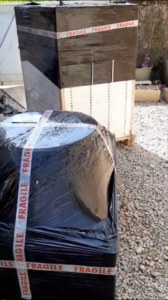
- Make sure you have adequate space adjacent to the flooring area to accommodate the pallets of tubing and boards.
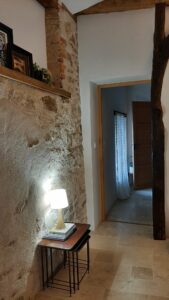
Enjoy your new warm space!
Let me know in the comments if you would be interested in an Underfloor Heating Part 2 that would include the benefits of radiant underfloor heating, where to source it in France and a cost break-down of materials, plus my cost to run the system over the past year.
À bientôt !
If you’d like to be notified by email when a new blog post is published, please sign up. You will not get spam, and I do not sell your information. This relationship is just between you and me.
Great stuff! Just the facts. U would be interested to find out the efficiency and cost estimates to heat the space.
Hi Andy! Thank you for the feedback. I’ll see what I can get together after going through the heating bills for the past 12 months.
Looks great..interested in part 2
Thanks Susan. Another vote for doing a Part 2. Have a great weekend!
Hi everyone!
Are you already signed up for email notifications? If not, and you want to be notified when a new blog post is published, go ahead and sign up. There won’t be a paywall, and we never share your information.
Bon week-end !
Maria
I’m interested in installing this system with solar panels to our barn conversion. I’m interested in part 2 please.
Thank you for letting me know you are interested in more information. I’ll definitely get something together in the next couple of weeks.
Hi Thanks for sharing. Nice work. Ive been planning to use this system upstairs to keep the weight down, once i get our new limecrete floor and ufh sorted on the ground floor. Looking forward to part 2 and any supplier info you have!
Hi Andrew. Thanks for your feedback. Lots of responses for a Part 2. I’ll see how the blog goes, and may even break it into three parts for the ordering. Just curious about what UFH system you are doing on your ground floor.